

DIY Dry Well Review – NDS FLO-WELL at Lowes, The Home Depot and Menards
 Dry well, DIY dry well, NDS Flow-well. Well, I want to talk about one of the more what I consider to be underused products on the market. I’m hoping to boost the awareness that this is out there because the do-it-yourselfers, I see what you guys are building. Oh my gosh. What you’re going through. Okay. You don’t need hardly any tools. This is stupid easy to put together.
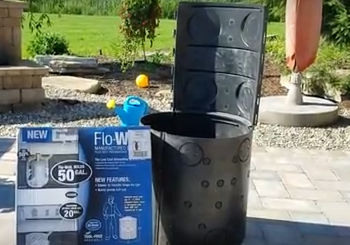
Here in Michigan, we can get these at Menards if you want to know where to buy these. I think Menards is in 14 states or so at least now. And they seem to be, I looked online, $90 bucks for a three panel and a lid, and you put them in with no floor. You’re supposed to put them in a better stone. You dig a big hole, you set this in. With the lid on it, they’re given the dimensions right almost 29 inches tall and it’s a two foot in diameter.
What I love about this is you need no tools, three panels and the top come in a box. You can bring this home in your car trunk. Take your sump pump line to it. This is an example of what not to do. Dig a hole. Put your sump line out in a trench to this whole full stone. How are you going to serve as a sump line? You might have a collapse. You might have a clog. Your pumping groundwater is full of minerals. Trust me, the day will come where it needs service. You have to snake it. How are you going to do that? Matter of fact, if it plugs here, you’re, you’re really done. So that’s what I love about this. And it ups your capacity it holds 50 gallons compared to a hole that will hold 20 gallons.
If you need a bigger system for a dry well, you can gang them together. Now here’s an image of four of them. Stacking is a must here in the north if you’re using them for your sump pump line. You don’t want it to freeze. You want it to be below frost. so what’s great is you can buy two of these kits and stack them really, really easy to use. You can see I got a panel that I just snapped on top there to show you. Now you got 48 inches, 49 inches. That’s perfect. You’re below frost you, you’re gunning for 42 and deeper always. That’s what you’re shooting for 42 inches or deeper here in the north.
Now I’m going to show you if you want to turn this into a basin for an outdoor, sump pump, they make a floor for it. Now you’re not going to put it midway up. I’m just using this for demonstration purposes. You can just set it in the bottom. That’s how easy it is. There’s the floor for it.
So great product, really easy to work with. Take a block of wood, preferably set it on a block of wood. Go ahead and knock out your drainage holes. Knock out any or inlet or outlet pipe. Always, always put an outlet basin on top. They’re going to call this an inlet basin and certain designs will show it as that, but I like it as an outlet basin. If the system becomes overwhelmed, you need it to have an overflow, some overflow protection, so this is a great way to do that.
This is a lid to a flow well dry well and you can just knock out that center part really easy. Go ahead and put that basin on top of those run like $25, $35. Again, a very affordable way for a homeowner to do a dry well.
For continued education in yard water drainage, subscribe to the French Drain Man YouTube Channel.