

No More Clogged Pop-Up Emitters
No More Flooded Yard
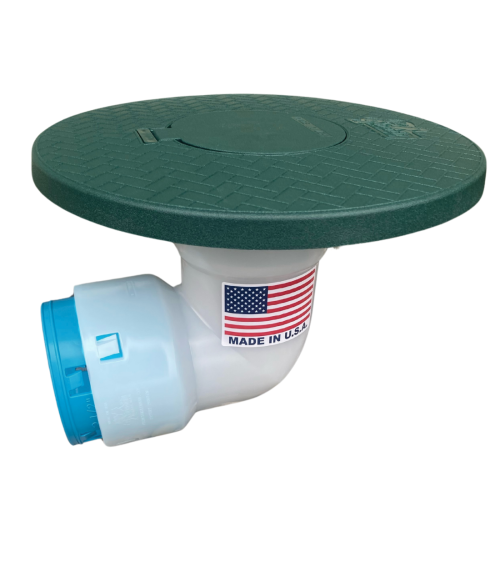
Clog-Free Design – Grass and vegetation will grow over the edge of FDM’s 11.5 in. Turf Restrictor Plate – not the drain opening – ensuring your pop-up emitter remains functional at all times.
Largest Opening in the Industry – The massive 4 in. hinged opening makes maintenance super easy. During heavy rains, large debris like pine cones and sticks will simply flow out of the line. This larger opening also provides plenty of room for homeowners to reach their hand down inside and clean out any left over debris when needed.
Built in Slope – Unlike a traditional 90 degree elbow, FDM’s Not Quite a 90 Fitting is specifically designed to optimize flow rate, and provides the perfect angle to redirect water away from the home.
Indestructible, Shatter-Proof, Mower-Resistant – This will be the last pop-up emitter you purchase. Why? Because you won’t need to keep replacing it! Our pop-up is 100% HDPE with no recycled materials. It’s built to withstand the toughest weather conditions, heaviest lawn equipment and has a lifetime guarantee not to crack.
Convenient Customization – Thanks to its versatile design, this pop-up emitter can connect to any 3, 3 1/2 or 4 in. drain pipe. Plus, the 4 in. hinged lid easily pops off, and can be replaced with any 4 in. drain grate or solid cover – making it a convenient tool for a variety of tasks.


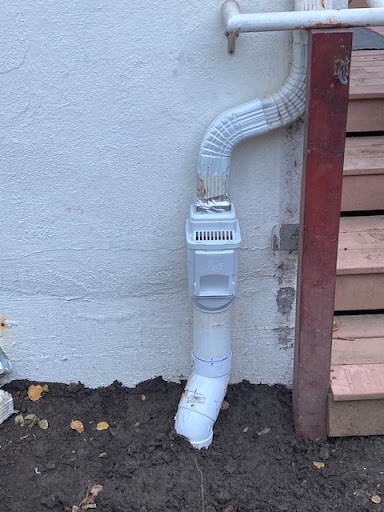
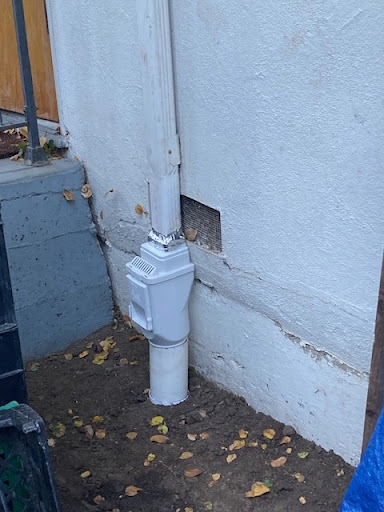
I had the catch basin positioned just before a Flo Well dry well, with a pop up emitter on top of the catch basin so it would overflow if the dry well got completely full.
One tip that I found, was to use the SDR pipe with the large built in coupling bell end at the top so the height of the NDS pop up emitter could be easily adjusted.


No More Clogged Pop-Up Emitters
No More Flooded Yard
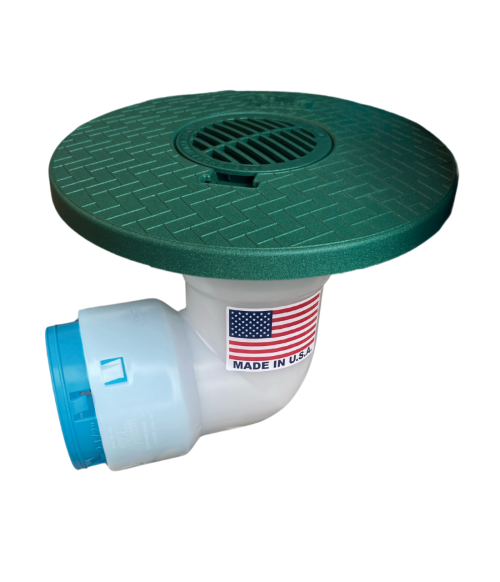
Clog-Free Design – Grass and vegetation will grow over the edge of FDM’s 11.5 in. Turf Restrictor Plate – not the drain opening – ensuring your pop-up emitter remains functional at all times.
Largest Opening in the Industry – The massive 4 in. hinged opening makes maintenance super easy. During heavy rains, large debris like pine cones and sticks will simply flow out of the line. This larger opening also provides plenty of room for homeowners to reach their hand down inside and clean out any left over debris when needed.
Built in Slope – Unlike a traditional 90 degree elbow, FDM’s Not Quite a 90 Fitting is specifically designed to optimize flow rate, and provides the perfect angle to redirect water away from the home.
Indestructible, Shatter-Proof, Mower-Resistant – This will be the last pop-up emitter you purchase. Why? Because you won’t need to keep replacing it! Our pop-up is 100% HDPE with no recycled materials. It’s built to withstand the toughest weather conditions, heaviest lawn equipment and has a lifetime guarantee not to crack.
Convenient Customization – Thanks to its versatile design, this pop-up emitter can connect to any 3, 3 1/2 or 4 in. drain pipe. Plus, the 4 in. hinged lid easily pops off, and can be replaced with any 4 in. drain grate or solid cover – making it a convenient tool for a variety of tasks.

Pop-Up Emitters
-
Sale!
TORRENTIAL RAIN™ 3½ in. Pop-Up Emitter & Turf Restrictor Plate Connects to 3½ in. Corrugated
43% Off
Original price was: $53.90.$38.30Current price is: $38.30. Extra $2 OFF each item with code TAKE2
-
Sale!
TORRENTIAL RAIN™ 3½ in. Pop-Up Emitter & Turf Restrictor Plate with Drain Grate Connects to 3½ in. Corrugated
43% Off
Original price was: $53.90.$38.30Current price is: $38.30. Extra $2 OFF each item with code TAKE2
-
Sale!
TORRENTIAL RAIN™ 4 in. Pop-Up Emitter & Turf Restrictor Plate Connects to 4 in. Corrugated
35% Off
Original price was: $53.90.$38.30Current price is: $38.30. Extra $2 OFF each item with code TAKE2
-
Sale!
TORRENTIAL RAIN™ 4 in. Pop-Up Emitter & Turf Restrictor PlateConnects to 4 in. PVC SDR 35
25% Off
Original price was: $54.00.$38.30Current price is: $38.30. Extra $2 OFF each item with code TAKE2
-
Sale!
TORRENTIAL RAIN™ 3 in. Pop-Up Emitter & Turf Restrictor Plate Connects to 3 in. Corrugated
43% Off
Original price was: $53.90.$38.30Current price is: $38.30. Extra $2 OFF each item with code TAKE2
-
Sale!
TORRENTIAL RAIN™ 4 in. Pop-Up Emitter & Turf Restrictor Plate with Drain Grate Connects to 4 in. Corrugated
33% Off
Original price was: $53.40.$38.30Current price is: $38.30. Extra $2 OFF each item with code TAKE2
-
Sale!
TORRENTIAL RAIN™ 4 in. Pop-Up Emitter & Turf Restrictor with Drain Grate Connects to 4 in. PVC 35 SDR
25% Off
Original price was: $54.00.$38.30Current price is: $38.30. Extra $2 OFF each item with code TAKE2
-
Sale!
TORRENTIAL RAIN™ 4 in. Pop-up Emitter Catch Basin with Sump Connects to 4 in. PVC SDR 35
Price range: $30.45 through $42.45 Extra $2 OFF each item with code TAKE2